
I Made Christine McConnell’s Halloween Candles!
If you have not already watched The Curious Creations of Christine McConnell on Netflix, I highly recommend that you do! I first watched the series when it debuted in 2018, and I became instantly OBSESSED. Christine is an incredible baker, crafter, and artist with a gorgeous pin-up model aesthetic and an affinity for the dark and curious. Imagine Dita Von Teese crossed with Martha Stewart. She is both stunning and absurdly talented. I have a MAJOR girl crush.

Over six 30-minute episodes, Christine shows how she makes her INSANELY impressive baked goods and crafts. The series also has a fun storyline, a few incredible Henson Company characters, and a perfectly morbid and raunchy script that makes me smile and laugh every time I watch it! Her character Rose is one of my favorite things EVER and makes me wish I had a Rose of my own. I re-watch the series every October (usually multiple times), and I was baffled when it did not renew for a second season.
In Episode 2, Christine shares her technique for making two-toned homemade and hand-carved candles. After years of wanting to make them, I finally did! Making candles was entirely new for me, but it seemed easy enough to do. It took some trial and patience, but I am thrilled that they turned out better than I expected!
If you would like to try your hand at this - keep reading to find out how I made them!
my one complaint…
Even though I adore this series, the tutorial and instructions on some recipes and projects aren’t very detailed. I was not able to find anything online that outlined precisely how to create the candles but at least this specific project was mostly straightforward. Alas, experience is the best teacher, and I can now add amateur candle-making to my skill set!
If you’ve made it to this blog post because you are looking for details like I was - welcome! I hope my insanely detailed notes below helps you out.
materials + tools
Melting Pot and Stove Top
Large Spoon, Ladle, or Small Measuring Cup
Standard Aluminum Foil
Heavy Duty Foil (optional but recommended)
Parchment Paper (super optional, but I did use a little)
Empty Paper Towel Roll
Tape
Candle Wicks with Clips (Christine uses a ball of cotton wick, but I prefer the pre-cut wicks with clips)
Paraffin Wax (for pillars, not jars. I bought a four lb. pack, and it was just enough for four candles)
Fork
Candle Liquid Dye (dark color like red, black, or deep purple)
Candle Fragrance or Spices (I used pumpkin pie spice)
Pro Tip #1: Check out your local dollar stores and thrift shops for some of the materials! I bought a small saucepan and ladle at the Dollar Tree to avoid ruining my All-Clad set. I am SO GLAD I did. Those last bits of wax are hard to get out, but I didn’t have to worry about it. I also found a tool I could use for sculpting and some foil there are well.
Pro Tip #2: Craft stores like Michaels and Joann usually have coupons online, so make sure you check their websites before you shop.
Of all the materials needed, the wax was the most expensive. It was $19.99 for a four lb. pack of paraffin pillar wax, $3.99 for a six-pack of large wicks with clips, and $3.99 for the red liquid dye. I spent $5 at the Dollar Tree for the small saucepot, $1 for the ladle, and $1 for the weird purple tool with the pointy end. I had a 20% coupon for Michaels, so I spent about $30 on everything.
As for the sculpting tools, I didn’t want to buy a set, but I did have a tool on hand that I use for pedicures that came in REALLY handy. Don’t worry; I cleaned it well before using it. It’s significantly cheaper than the tools at Michaels ($3.99-ish on Amazon), and the triangle-ended tool was perfect for scraping chunks and larger areas (Link: amzn.to/3DLkV0S).

directions
Before starting, watch Episode 2 (starts at 10:55) to get an idea of what you’ll need. My directions below are super detailed, but I am sharing everything I learned so you may benefit from my trials and errors.
Step 1: Make a Mold
Tear off a piece of heavy-duty aluminum foil and grab your empty paper towel roll. You could use regular aluminum foil (Christine did), but the heavy-duty stuff results in a studier mold.
Fold the edges of the foil to the length that you want your candle. I made mine about 3/4” of the size of the paper power roll to have enough wick exposed to hold for the second layer of wax. Make sure that you leave the shiny side of the foil smooth and make your folds towards the dull side. Wrap the shiny side of the foil around your paper towel roll and use tape to seal it closed.
Cap the end of the mold with a square of parchment paper, and then wrap a layer of REGULAR aluminum foil over it. Don’t use the heavy-duty foil - it will create sharp edges and won’t wrap around the base easily. Smooth it tightly around the mold. Wrap the base with tape to keep the foil and parchment in place.
Note: Christine uses only foil and then pokes a hole into the base to thread a length of cotton wick through it with a knot at the end. I tried this method on one candle, and it leaked way more than I liked. She acknowledges that it might leak, but honestly, it’s not worth it. Using wicks with clip ends made it easy to place inside the mold and not worry about poking holes.
I tried a few different methods of capping the ends of the molds. I had the best results and zero leaking by using the parchment and foil method.
Remove the paper towel roll and make three more molds (if you want). I used nearly all of the four lb. pack of wax for four candles.
Place the clip end of the wick into your mold. You can roll a piece of tape for a double-sided effect and use that to keep the wick clip in place.
Step 2: Prepare Your Wax and Workstation
Heat 1/2 of the paraffin wax in your saucepan over low heat. It took a few minutes for everything to melt. The ideal temperature to add the liquid dye is around 185 degrees, but it will be MUCH hotter than that by the time all the wax is fully melted. Use your kitchen thermometer to check the temperature until the wax is ready.
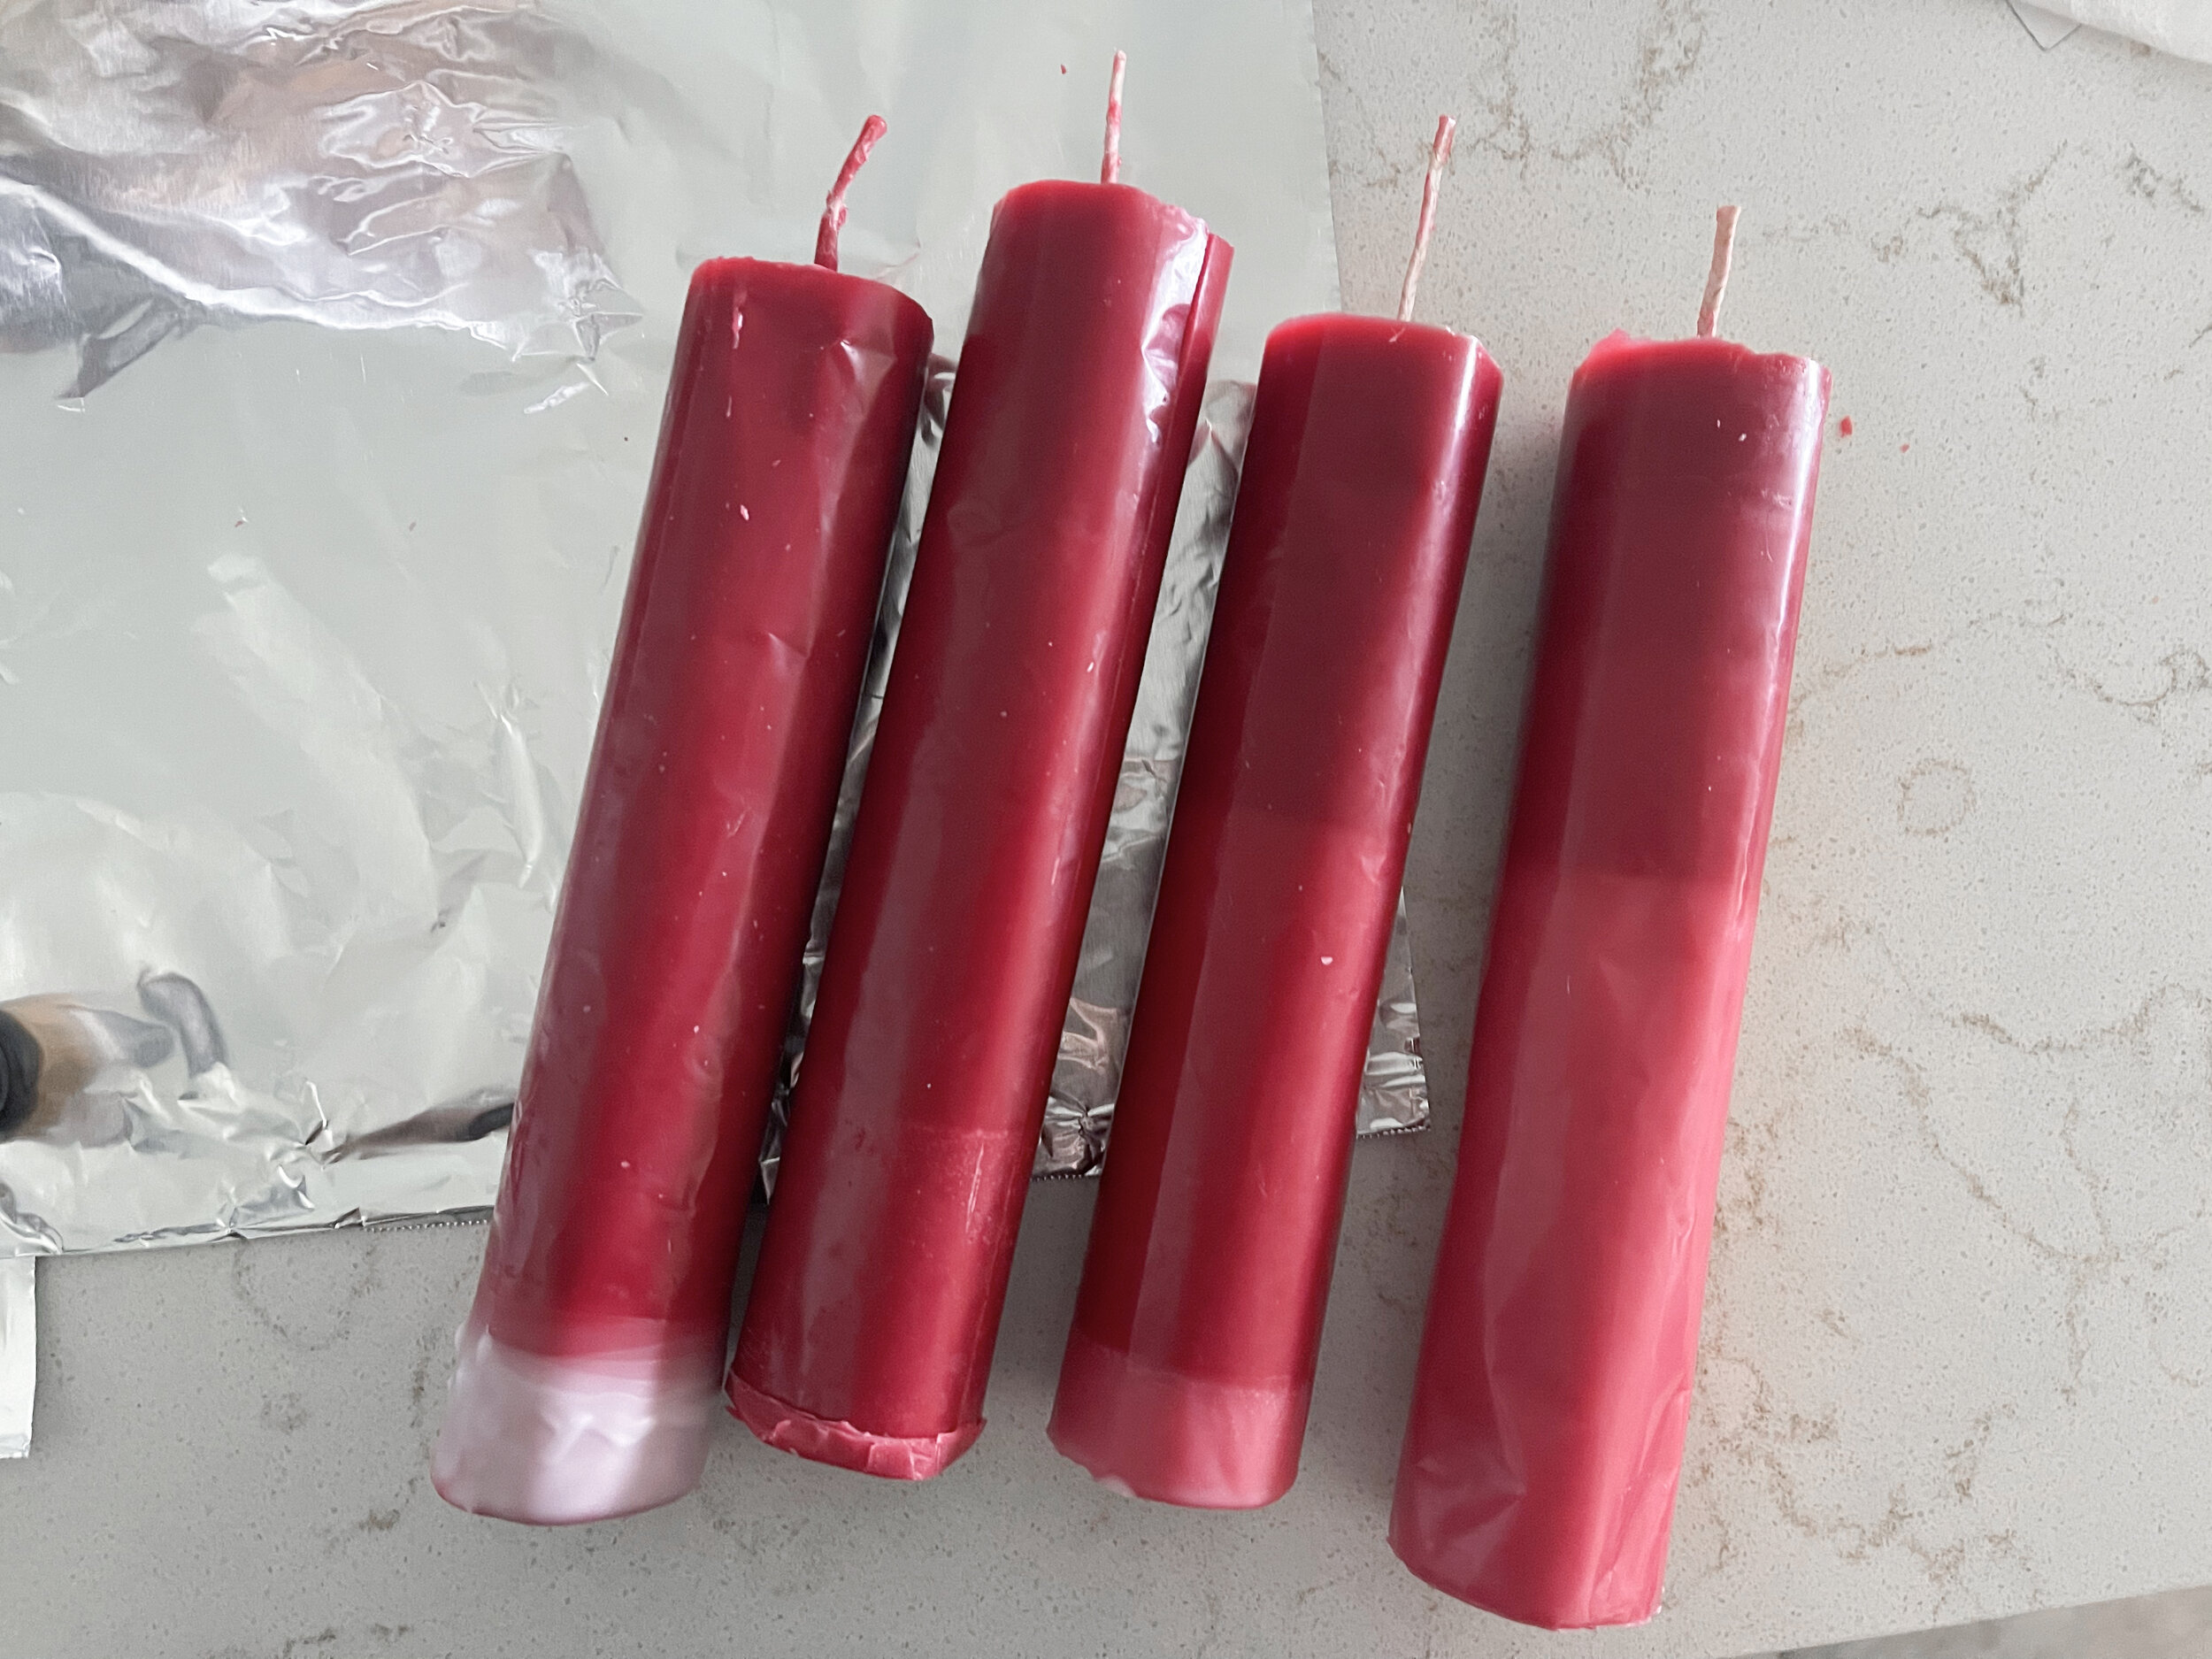
Turn off the heat and wait a few minutes until the wax is slightly cooler, then add three droppers full of your liquid dye. The instructions on the box of dye indicated using only a few drops of dye per half a pound of wax, but I learned I needed much more to get the dark red I wanted. You can see the different levels of red in the photo below from my multiple attempts. Three full droppers eventually resulted in the deep red I wanted.
Add your scent. I used pumpkin pie spice. It did not offer much fragrance, but the wax did smell a bit nicer.
Prepare your workstation. I covered my countertops in aluminum foil and used a potholder to support my hot saucepan. You might want to layer your stovetop with foil as well, in case any wax drips off your ladle/spoon while you stir.
Step 3: Fill your Molds
Using your ladle or small measuring cup, pour your red wax into your molds. To keep the wick clip in place, I first placed a small amount of wax into the base and let it cool. After it was set, I filled the rest of the mold.
Step 4: Wait for it to Cool
You’ll need to wait several hours before you can unmold your candles. I completed the first steps before bed and let the candles cool overnight.
Don’t be alarmed if you get sinkholes in your candle tops. It is a common reaction. I made more of the red wax and filled the sinkholes, allowing it to cool again.
Once cooled, it’s super satisfying to peel off the foils. Some wax might have settled between the rolled layers of foil, but it won’t affect the final product. Make sure to unwrap them over your covered workstation to avoid chips of wax everywhere.

Step 5: Pour Your White Wax Layer
Here is where it gets tricky, or at least…it was tricky for me. Heat the other half of your paraffin wax, add your scent (no color this time since we want the outside to be white), and let it cool to around 150 degrees.
Hold a candle by the wick over your pot of wax and use your ladle to pour wax over your candle carefully. It took a couple of minutes to thoroughly coat the white wax over the red wax until it was opaque enough not to see the red anymore.
IMPORTANT NOTE: If your wax is too hot, it will start to melt your layers underneath.
IMPORTANT ANNOYING NOTE: If your wax gets too cool (I noticed it starting around 130 degrees), the wax will begin to bubble as it splashes back into the pot, and then your layer will have bubbles. It is VERY ANNOYING.
You have to find the sweet spot, and you’ll most likely have to re-heat your wax a few times since it doesn’t stay in the sweet spot for long. The annoying bubble layer melted off once I re-heated my wax, but I had to watch out for the temperature and be patient.
Step 6: Let it cool...again
Step 7: Carve Your candle!
Just like Christine did in her show, I traced my outline before carving each face.
Since the wax is layered, I found it easier to use a smaller pointed end to cut around the edges. When I used a knife or wider-edged tool, it started to lift and chip the wax on the opposite side of my outline, which was not what I wanted and would ruin the shape. You’ll have to play around with your tools to see what works best for you!
Carve the tops with a fun design. You can also use the fork trick Christine uses for the tree bark effect. I went over the fork lines with my pointy tool to deepen and define the lines.
Be patient - carving takes time. I think it took me at least 45 minutes to carve each candle, but it was worth it in the end! I made a huge mess with the carved wax, so again, make sure you’re working over a covered workstation. I set a paper towel on top of my foiled countertop, and when I had a large pile of shavings, I just lifted one end of the towel to move them out of the way.
Step 8: admire your work!
Hooray! My fingertips were practically numb at the end of carving three candles. Even though I poured four, one of them fell off the counter onto my tile floor, and a chunk of the white wax broke off. Since I was tired, I didn’t even bother trying to salvage it. Oh well!

happy dance!
I am thrilled with how my three candles turned out! When I started carving them, I had serious doubts…but it all came together, and I’m so happy I didn’t end up with a depressing Pinterest fail. Even Mr. San Diego complimented my work, which was exciting since he can be VERY honest at times. Now that I know how “easy” this process was, I might tinker with other candle-making methods and less processed wax bases like beeswax!
If you plan to make these, let me know in the comments! I’d love to hear how yours turn out!